Home
HomeKodi formerly now as XBMC, is a very capable media center that's available for a multitude of different platforms but arguably works best and is easiest to set up on an Android TV box — especially if you're looking to integrate it into your home theatre setup. Meanwhile, the best android TV box that you can buy is the Nvidia Shield TV 2017. This is the best gadget of the segment and has superior quality features and the most advanced technology with a great brand name which everyone trusts on. For those DVD collectors who bought Nviadia Shield TV 2017, you may wonder the possibility to stream DVD movies for watching on Nvidia Shield TV 2017 via Kodi. The following post will show you a full workaround to achieve that.
Is it Possible to Watch DVD movies on Nvidia Shield TV 2017 via Kodi?
The first thing you need to do is to recognize whether your DVD discs are copy-protected or not. If so, you need to remove all the protections from your DVD discs first. As most of the commercial DVD discs are under copy protection, you can't play these DVD movies on Nvidia Shield TV 2017 via Kodi.
Plus, unlike a PC, the SHIELD Android TV is an embedded system. So, the codec involves NVIDIA signing licensing deals. For example, support for Dolby Digital / Dolby Digital Plus requires deals with Dolby Laboratories, while DTS / DTS-HD support requires deals with DTS. On the video side, H.264 support, for example, requires a deal with MPEG-LA. Each of these deals ends up increasing the end cost for the consumer. In order to hit an acceptable price point while ensuring all necessary components for OTT streaming (SHIELD's primary market) are in place, NVIDIA has signed deals for the following audio/video codecs only:
- H.264
- H.265
- VP9
- Dolby Digital (Update: only bitstreaming, no internal decode to PCM)
- Dolby Digital Plus (Update: only bitstreaming, no internal decode to PCM)
Does that mean you can't stream DVD movies for watching on Nvidia Shield TV 2017 via Kodi? Actually, it's a piece of cake to get this work done.
Rip DVD for Nvidia Shield TV 2017 & Kodi Streaming
To stream and watch DVD movies on Nvidia Shield TV 2017 vid Kodi, just download our splendid DVD Ripper program - Pavtube BDMagic ( Get Mac Version ) to bypass all DVD encryption and also encode DVD to Nvidia Shield TV 2017 readable H.264/H.265 video codec and Dolby Digital AC3 codec.
What's more, this application also provides wide range of editing options: Want to trim and crop the video? OK. Want to split and merge the video? OK. Want to add SRT/SSA/ASS subtitle file in video? OK. You can be the master of your DVD movies.
Tips: The windows version of Pavtube BDMaic supports H.264 & H.265 codec encoding acceleratation on a computer with Nvidia Graphic Cards that supports Nvidia CUDA or AMD App technology, which helps to encode DVD with up to 30x speed.
Step by Step to Rip DVD for Nvidia Shield TV 2017 Streaming via Kodi
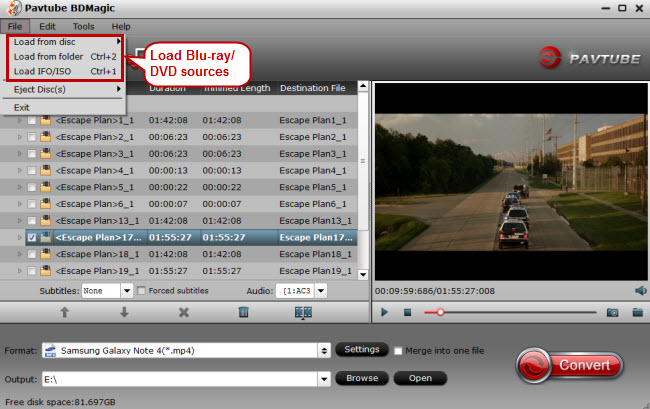
Step 1: Load DVD movie into the program
Insert the DVD disc into your computer's optical drive, click "File" > "Load from disc" to load DVD disc into the program. Besides DVD disc, you can also use the program to load Video_TS folder, IFO or ISO image file into the program.
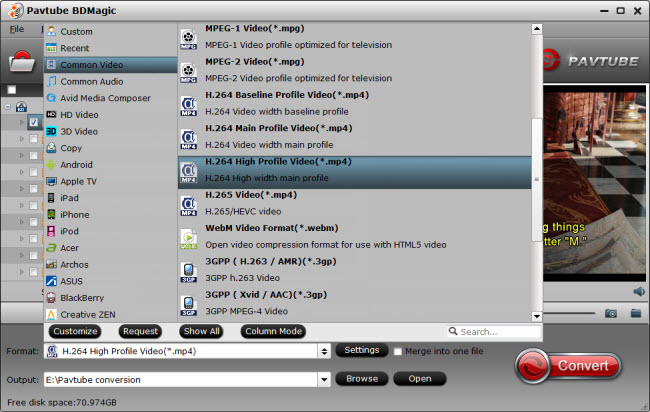
Step 2: Select output file format
Click "Format" bar, from its drop-down list, select Nvidia Shield TV 2017 supported H.264 file format by following "Common Video" > "H.264 High Profile Video(*.mp4)".
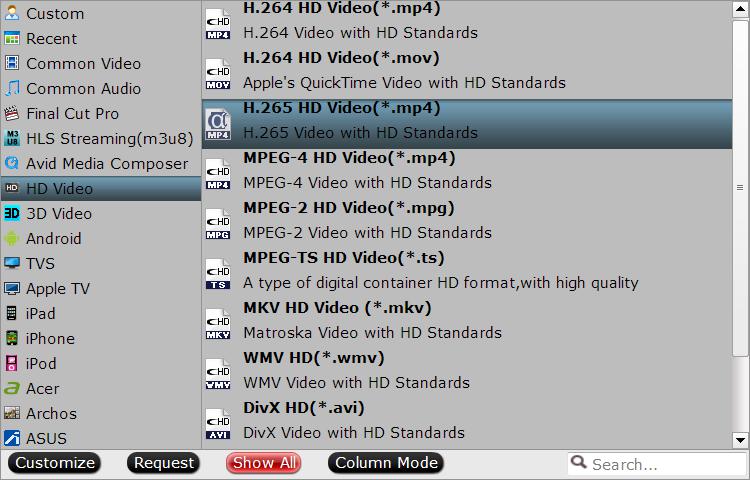
Tips: If you collect some Blu-ray movies, you can also use this application to encode Blu-ray to H.265 codec with best quality and small file size for smooth streaming with less bandwidth.
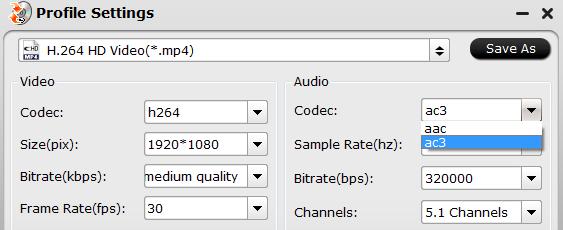
Step 3: Adjust output audio codec for Nvidia Shield TV 2017
Click settings to open "Profile Settings" window, here you can adjust output audio codec as Dolby Digital AC3 for playing on Nvidia Shield TV 2017. To get the best output file quality, you can also adjust other profile parameters such as video frame rate, size, bit rate, sample rate, channels, etc according to your own needs.
Step 4: Begin the DVD Ripping process.
Go back to the main interface, hit the right-bottom "Convert" button to start DVD to Nvidia Shield TV 2017 playable formats ripping process.
When the conversion is completed, you will have no problem to stream and play ripped DVD on Nvidia Shield TV 2017 via Kodi.
Tip 1: How to set up Kodi on NVIDIA Shield TV 2017
Installing Kodi onto your NVIDIA Shield TV 2017 is by far the easiest part of setting up the app. Since it's available right from the Google Play Store, it's as easy as downloading any app onto an Android device.
1. Open the Google Play Store app on the NVIDIA Shield TV 2017.
2. Search for Kodi.
3. Select Install to download the app.
Installing Kodi is just the beginning. You'll need to either transfer your media files to the internal storage on the console or download some Kodi add-ons to stream content over Wi-Fi. We'll discuss how to do both.
How to transfer files to your Nvidia Shield TV 2017?
Organize your media files based on the folders in the Shield TV's root file system so that it's easiest to organize them in Kodi. Once you've got your files transferred onto the console, it's fairly straightforward to set things up in Kodi:
1. Go into Kodi.
2. Select the category of files you want to set up (Pictures, Music, or Videos). For this example, we'll use Movie.
3. Select Files.
4. Select Add Movie….
5. In the pop-up window, tap Browse.
6. Tap External storage.
7. Scroll down and select the folder that you stored all your movie in. Select OK.
Congrats! You have now set up that folder in Kodi as a source for your movie. You can continue to add or remove movie files to that folder and have everything populated nicely for you in Kodi. This works the same for music or pictures, too, so you can load in all the media you would want on hand at all times.
Tip 2: How to Clear Your Cache on Kodi?
Have you been experiencing slowdowns and glitches while using Kodi? If so, it may be time to clean your cache. Keep reading for a brief guide that will show you how to quickly clear your cache on Kodi.
Step 1: From your home screen, select Add-ons.
Step 2: And after selecting the Addons tool it will move to next step in that, select Install From Zip File.
Step 3: Next, select Program Addons from the screen.
Step 4: Select Maintenance tool and Install it.
Step 5: Select Cache Size: ______– Click To Clear
A pop-up window will appear on the screen asking if you to confirm that you wish to clear your Kodi application cache. Click on Clear.
Note: In this step you can enter the size of your interest. We would recommend to clear a part of cache first then test the performance. If kodi still runs slow then clear more cache.
Step 6: Select, Packages Size: _____ – Click to Clear
Packages are the updates to your Kodi Add-ons. It will update automatically to the latest version. When you select to clear this, a pop-up window will open asking you to confirm that you wish to delete your old addon installation packages. Select Delete
Step 7: Then go back completely and click General Maintenance
Step 8: After clicking the General Maintenance Tool it will Go to next window in that. Click on Clear Cache to clear cache on kodi.
Step 9: Once you complete this final step, it’s a good idea to reboot KODI. Go back to your home screen and exit out of the system. Wait a minute and launch Kodi when ready.
The above steps are the steps to clear cache on KODI. You can always repeat this process anytime you feel the need. (Source: How to clear the cache on kodi 2017)
 Free Trial BDMagic