Home
HomeIn our lives, many people tend to upload their short films and home-made videos to Vimeo and share them with friends and family. If you happen to have some DVD collection at hand, do you think of uploading your DVD to Vimeo for sharing? I bet you do! But for DVD addicts attempting to upload DVD to Vimeo, they will pull a long face snoot since this video-sharing site doesn't accept DVD format. In this article, you will get the fastest way to transfer DVD to Vimeo for entertainment.
Vimeo Video Upload Limitations
All of the video sharing sites including Vimeo doesn't support DVD video format. So, we need to convert DVD to Vimeo acceptant video files.
Vimeo has limitation on both the file size and video formats uploaded to it. Following are the specific limits:
Size: The videos should be at least 200KB in size, Vimeo uploads 500MB of video per week up to 25 GB a year
Video formats: Vimeo supports to upload video with the format of MP4, FLV, AVI, WMV , MOV, MPEGPS, WebM and MPEG4
Best compression settings for Vimeo uploading
Codec: H.264
A codec is the format in which your video will be encoded. Vimeo accepts most major video codecs, but for best results we recommend using H.264.
H.264 Main Profile mp4 video for SD video
H.264 High Profile MP4 video for HD video or UHD video uploading
Frame rate
When preparing your video for upload, it's best to maintain the video's native frame rate when compressing your video. If your footage exceeds 60 FPS, Vimeo will automatically reduce the frame rate. If there is an option for keyframes, choose the same value you used for frame rate. Important: Always choose "constant" frame rate instead of "variable" frame rate.
Bit rate
Bit rate (also known as data rate) controls the visual quality of the video and its file size. If your video editing software gives you the option, choose a "variable" bit rate and select a value from the ranges below. You can experiment with different rates if your file is too large or you're not happy with the quality of your source file.
Resolution
Video come in all shapes and sizes but there are some of the most common formats.
Audio compression settings
Codec: AAC-LC(Advanced Audio Codec)
Data rate: 320 kbit/s
Sample rate: 48 kHz
Best Recommendation to Convert DVD to Vimeo supported format
Pavtube DVDAid- the best DVD Converter just meets your needs, which works as a DVD video editor as well. This program can better satisfy all the great demand to rip DVD to Vimeo in the following aspects:
# Handle with commercial DVD with copy protection and region code.
# Directly export Vimeo best uploading SD format "H.264 Baseline/Main Profile Video (*.mp4)", HD format"H.264 High Profile Video(*.mp4)" and also AAC-LC audio codec.
# Flexibly adjust output profile parameters such as video codec, bit rate, frame rate, resolution, audio codec, bit rate, sample rate, channels, etc to make them adapt with Vimeo best uploading settings.
# Compress vimeo video to save a good amount of storage space with no quality loss with the programs built-in trimming function to remove unwanted parts from the video or the splitting function to split large video into small clips by file size, count or length.
# Support up to 30x speed H.264&H.265 encoding acceleration if you run the program on a computer with Nvidia Graphic cards that supports Nvidia CUDA or AMD APP technology.
Besides above listed important functions, the program also allows you to edit DVD movies according to your taste, you can add watermarks, add subtitles, change video visual effects and more. This best Vimeo DVD Converter keeps constant update with perfect support for the new Windows 10 and macOS High Sierra. Now follow the guide below.
Guides on ripping DVD Movies for sharing on Vimeo
Pavtube Software offers two versions to finish the task of DVD to Vimeo conversion. For Mac users, you can download Mac Version DVD to Vimeo ripper. For windows users, you can just download DVD to Vimeo Converter for Windows on your PC.
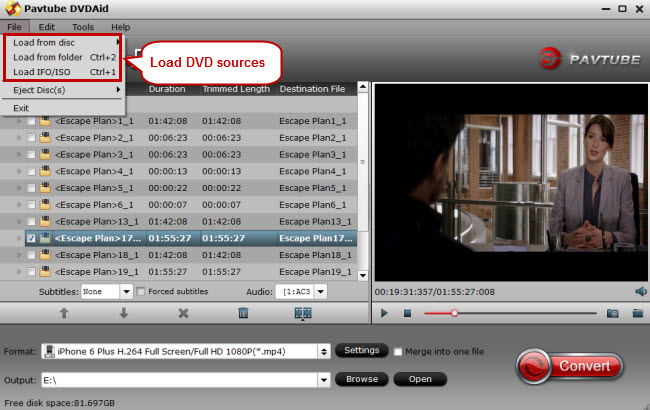
Step 1: Import DVD Source
Load the DVD movies by clicking the "Load DVD" button on the top left. This DVD converter also supports ripping DVD Folder, DVD IFO File and DVD ISO Image File
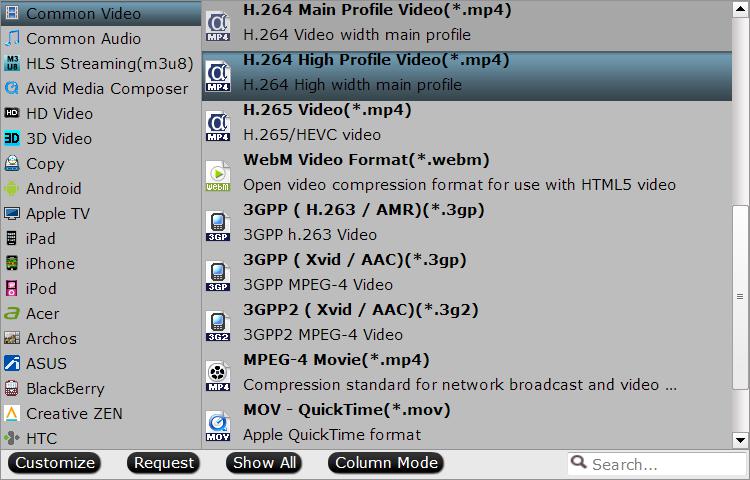
Step 2: Define output format.
Click "Format" bar, select Vimeo best uploading H.264 formats from its drop-down options, for uploading HD videos, it is ideal for you to choose "H.264 High Profile Video(*.mp4)" from "Common Video" main category menu.
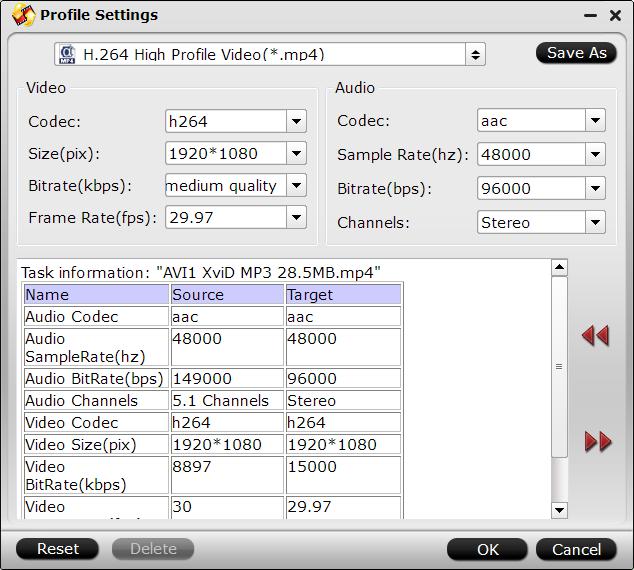
Tip 1: Customize output profile parameters for Vimeo uploading
Click "Settings" to open the "Profile Settings" window, here you can adjust the output video codec, resolution, bit rate, frame rate and audio codec, bit rate, sample rate and channels to make them adapt with best Vimeo uploading settings listed above.
Tip 2: Edit DVD before uploading
To upload wanted clips in DVD movie, you can go to “Video Editor” window to use the “Trim” function. You’ll find other editing functions like cropping, adding watermarks, adjust special effects, etc.

Step 3: Start Ripping DVD to Vimeo
After the above two steps, go back to the main interface and click the "Convert" button to begin converting DVD movies to Vimeo highly compatible MP4 video files. When the conversion is done, click "Open output folder" to locate the ripped videos and upload them to Vimeo with ease!
How to Upload ripped DVD to Vimeo?
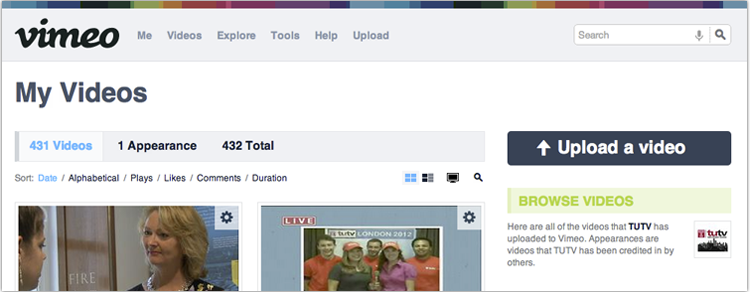
1. Go to Vimeo.com and sign into the Vimeo account recommended by your instructor. Click the Upload a video button, which should appear at the top left.
2. Click the Choose a video to upload button and navigate to and select the file or files you want to upload (use the .mp4 or .mov files you compressed for the web earlier). Click Open.

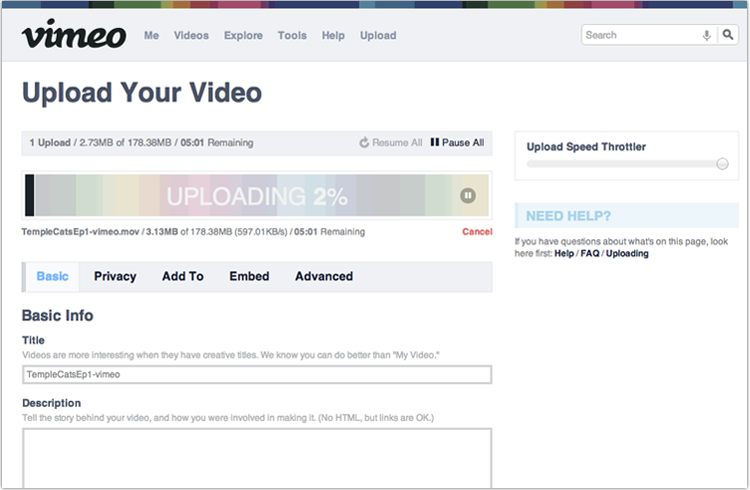
3. The file(s) should appear as depicted below. Click Upload selected videos.

4. Now your video will begin uploading. You must leave this page open until it finishes. Once it is done, enter a title, description, tags, etc. and click Save.
 Free Trial DVDAid