 Home
HomeHeads up Kodi fans! You can now download Kodi 17.4 on all platforms! Kodi 17.4 is an update that focuses more on bug fixes rather than adding new features. In a word, fixes are always good. Less crashing, more enjoying the entertainment you love! As we all know, Kodi is designed to be hooked up to a TV or a large monitor, but there's nothing to stop you from running it on a laptop or just about any other device (it's available for many platforms). It allows users to play and view most streaming media, such as videos, music, podcasts, and videos from the internet, as well as all common digital media files from local and network storage media. How about the Blu-ray? This article is a ultimate solution for you to add any of your Blu-ray to Kodi 17 for enjoyment.
Complete Guide: Play Blu-ray With Kodi 17
As Kodi 17 lacks a built in Blu-ray decoder, it does not have the ability to launch Blu-ray discs. Fear not however because it does have the ability to use external players so you can integrate another PC Blu-ray decoder to handle your discs within Kodi 17 and add Kodi blu-ray support.
For Kodi Blu-ray disc playback you will need three things:
1. A PC or HTPC media centre running Kodi
2. A Blu-ray disc drive
3. A PC Blu-ray player application because this will become your external player
There are many PC Blu-ray player in the market that can make Kodi 17 play Blu-ray discs. Without doubt Cyberlink PowerDVD 16 Ultra is the best option. Firstly its Blu-ray playback capabilities are second to none. Secondly Cyberlink PowerDVD 16 Ultra is currently the only PC Blu-ray player capable of launching 3D Blu-ray discs! If you have 3D Blu-ray discs in your collection then you are going to need it. Now, let's start to set up Cyberlink PowerDVD 16 Ultra in Kodi 17 for Blu-ray playback.
Step 1: Setting Up Cyberlink PowerDVD 16 Ultra in Kodi
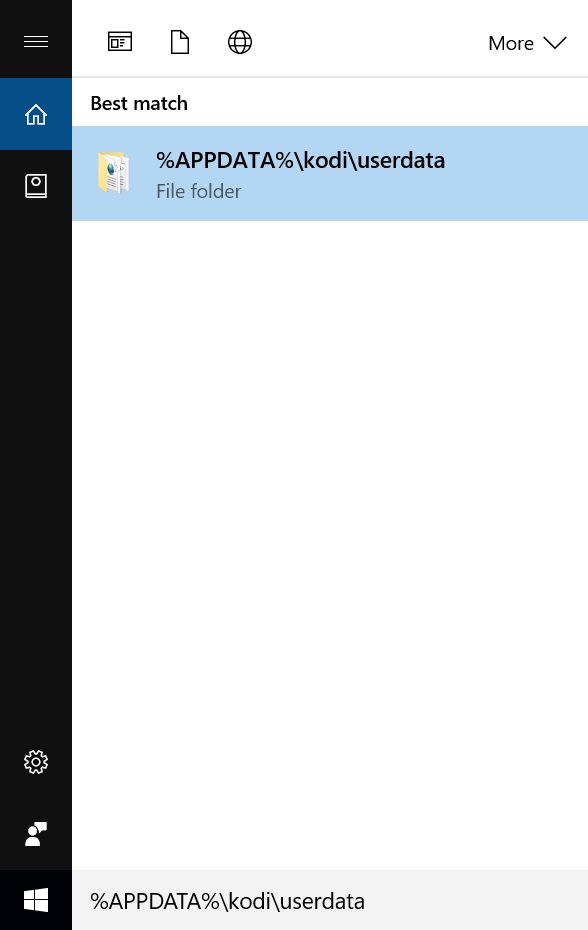
To play Blu-ray disc movie via Kodi 17, follow the steps below to setup Cyberlink PowerDVD 16 as an external player. All external players including Cyberlink PowerDVD 16 are configured using an XML file called playercorefactory.xml which needs to be placed in the Kodi Userdata folder. In this guide, we are using Windows 10 so in the Cortana box found at the bottom left of your screen enter the following command:
%APPDATA%\kodi\userdata
It will display the Kodi Userdata folder at the top of the Window as shown in the image below. If you are using an older version of Windows you can get to this folder using a standard “Run” command.
Click on the folder at the top and it will take you to the Kodi Userdata area. Next right click somewhere in that folder and select “New” and then “Text Document”. It will create a new text document and you now need to rename this file to playercorefactory.xml . Make sure that you have the folder set to show file extensions so that you can edit the full name of the file.
Step 2: Configuring the Playercorefactory.xml File
After created the file open it with Notepad, within this file you can configure any external players that you want to use with Kodi 17. I have included below the text required to configure the Cyberlink PowerDVD 16 Ultra for Kodi Blu-ray disc playback because this is the top Blu-ray decoder. Copy this text into your new playercorefactory.xml and save it.
<playercorefactory>
<players>
<player name="PowerDVD" type="ExternalPlayer" audio="false" video="true">
<filename>C:\Program Files (x86)\CyberLink\PowerDVD15\Movie\PowerDVD Cinema\PowerDVDCinema.exe</filename>
<args>D:\</args>
<hidexbmc>false</hidexbmc>
<hideconsole>false</hideconsole>
<warpcursor>none</warpcursor>
</player>
</players>
<rules action="prepend">
<rule filetypes="bd|ifo|bdmv|mpls" player="PowerDVD"/>
</rules>
</playercorefactory>
Note: If you are using an alternative Blu-ray decoder to Cyberlink PowerDVD 16 Ultra or you have changed the default installation path of the application you need to enter the correct path for your decoder between <filename> and </filename> shown in red.
Step 3: Kodi 17 Disc Settings
At this stage Cyberlink PowerDVD 16 Ultra is configured as the default player to play Blu-ray with Kodi 17. We must now change a couple of settings within Kodi 17 to complete the job because we want our Blu-ray discs to fire up when inserted. Fire up Kodi 17 and on the main menu select “Settings”, then “Video” and then “Discs”. You will be presented with the following screen:
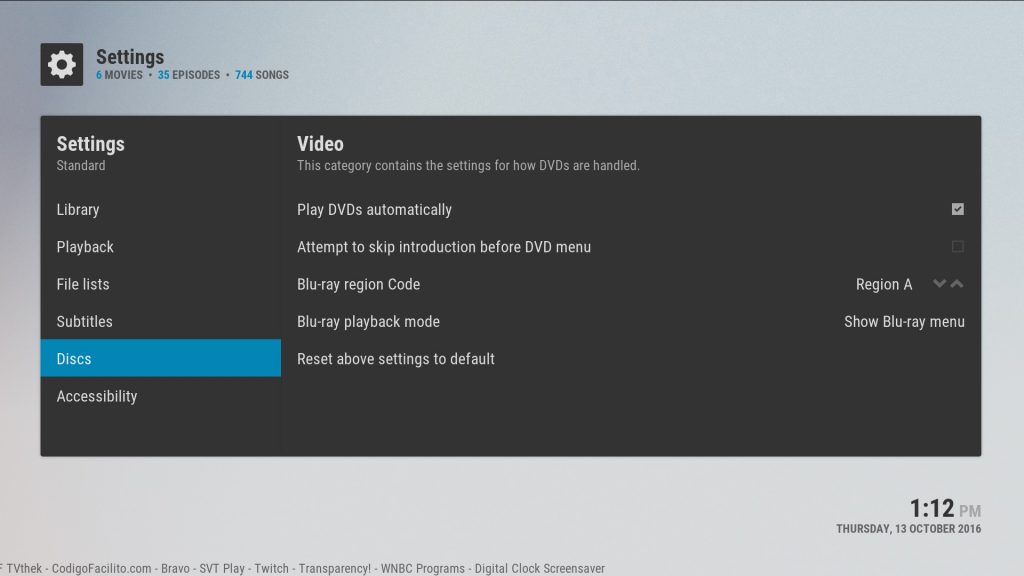
I am using a custom skin but the menu steps are the same. Where it says “Play DVDs automatically” put a tick in the box. This will ensure that Kodi 17 launches your Blu-ray disc when inserted. If you do not tick this box your Blu-ray movie will appear at the top right of the Kodi application when you put the disk in.
And that’s it! You can now play Blu-ray with kodi 17. You now have Blu-ray playback in Kodi 17 using Cyberlink Power DVD 16 Ultra as an external player. Go back to the Kodi home screen and insert your Blu-ray movie. If you have have followed these steps correctly you movie should auto start and begin playing. (Click here to see the the original post)
Get commercial Blu-ray disc played on Kodi 17
Kodi 17 supports Blu-ray playback but only limited for these unencrypted. So what about your commercial Blu-ray disc? How to play these encrypted Blu-ray movies on Kodi 17? In order to make all your Blu-ray collections to Kodi 17 for playback and streaming smoothly, you'd better ask help from a third party Blu-ray ripper to remove Blu-ray copy protection and rip Blu-ray to Kodi 17 compatible video formats as below:
| Kodi 17 Supported Formats | |
| Container formats | AVI, MPEG, WMV, ASF, FLV, MKV/MKA (Matroska), QuickTime, MP4, M4A, AAC, Ogg, OGM, RealMedia RAM/RM/RV/RA/RMVB, 3gp |
| Video formats | MPEG-1, MPEG-2, H.263, MPEG-4 SP and ASP, MPEG-4 AVC (H.264), H.265 (as from Kodi 14) HuffYUV, MJPEG, RealVideo, RMVB, WMV |
| Audio formats | MIDI, AIFF, WAV/WAVE, AIFF, MP2, MP3, AAC, DTS, ALAC, AMR, FLAC, RealAudio, WMA |
| 3D video formats | Passive 3D video formats such as SBS, TAB, Anaglyph or interlaced |
There is a solution called Pavtube ByteCopy for Windows/Mac, which is better reviewed than other current Blu-ray ripper applications. It is pretty simple to use with a nice interface. Besides removing the copy protection from the Blu-ray disc on the fly, it can beneficially to output Blu-ray to Kodi 17 best compatible formats for playback with perfect quality. In the Blu-ray to Kodi 17 conversion process, you can keep the Dolby Digital 5.1 sound, TrueHD 7.1 audio, DTS-MA audio. It can rip 3D Blu-ray to 3D MP4, 3D MKV, 3D WMV, 3D MOV, 3D AVI for Kodi 3D playback.
Play Blu-ray on Kodi 17 with subtitles
To better unstand the Blu-ray movie when watching on Kodi 17, there are some beneficial subtitle functions for you to achieve that. You can select desired subtitle from Blu-ray movie, enable forced subtitles. You can also choose to download and add external subtitles to Blu-ray movies when there are not your desired subtitles in original Blu-ray movie.
Step by Step to Rip Blu-ray to Kodi 17
Step 1. Load Blu-ray movies
Install and run the Blu-ray ripper, click the “Load Disc” button to add the Blu-ray movies to the program.

Tip 1: Click the drop-down list of Subtitles, then all the subtitles info in the Blu-ray disc movie will be shown clearly, so you can select your needed language as your subtitles freely.
Tip 2: Tick off "Forced subtitles" option besides "Subtitles" option, you will be enabled to see subtitles only when actors are speaking a different languages from your desired subtitle languages.
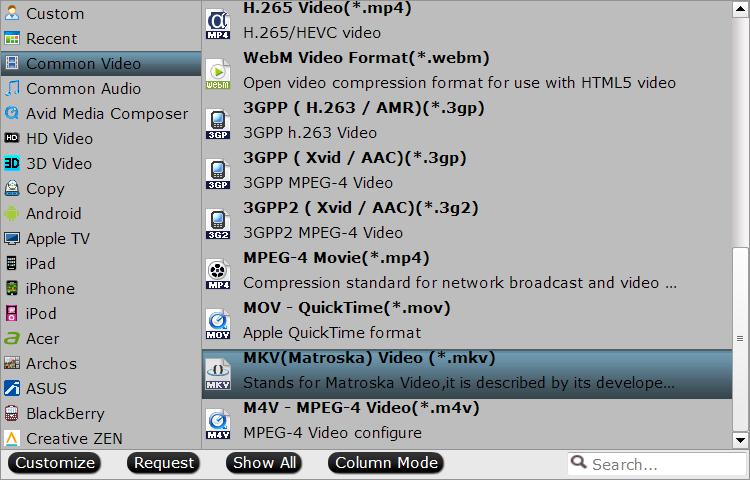
Step 2: Select Kodi 17 playable file formats
Click "Format" and from its drop-down selections, you can choose to convert Blu-ray to Kodi 17 supported MKV, MP4, AVI, MOV, etc format, such as "Common Video"> MKV (Matroska) Video (*.mkv)" that preserves the subtitle languages, audio tracks, menus and chapter information in original Blu-ray disc movies.
You can also select lossless MKV format in "Multi-track Video". In this way, you can keep lossless image and sound quality and all the subtitle and audio tracks.
Tip: All formats here are set with optimized video/audio codecs, bitrates, frame rates, etc. But you can still specify as you like by clicking "Settings" button. In the Profile Settings window, you can choose or specify exactly the parameters you like.
Step 3: Start Blu-ray to Kodi 17 conversion process
Go back to the main interface, click right-bottom "Convert" button to start the conversion process immediately.
When the conversion is done, click "Open Output Folder" button to pop out the folder with converted files, then follow the next steps to add converted Blu-ray movies to Kodi 17 for playback with not problems.
1. open Kodi 17.
2. Select “Videos” in the home screen menu.
3. Seclect Files, then select “Add Videos”.
4. Click on “Browse” button.
This requester you can select the location where your Blu-ray movies are located on your system. You can also choose a network drive if your transfer the ripped Blu-ray movies to there, this tutorial will use the network drive option and we will select “Windows network (SMB)”.
5. In the next screen you should see the directories within your selected directory.
If this is the right directory select “OK”. If all is ok then select “OK” again.
In the next screen is where we tell Kodi 17 what our source directory contains, in this case its “(Movies)”. When you are happy with the settings select “OK”.
6. Next screen is refresh info for contents of selected directory, select “Yes”.
When you’ve selected ok you will be presented with this next screen, keep an eye on very top almost to the right as this updates the database with info about the films it finds.
This item can take a long time depending on how many moives you have in your collection.
7. When finished, the converted movies library should be listed on the interface.
 Free Trial ByteCopy


