 Home
HomeNowadays many cameras and camcorders can record full HD 1080P 50p/60p videos, such as MOV and AVCHD 50P/60P files. The 50P/60P AVCHD files are good to maintain the quality of the video, but they are not easy to use. For example, if you want to edit recorded AVCHD footages in FCP X on Mac, you can’t import 50P/60P AVCHD videos to FCP X directly, the FCP X doesn’t support 50P/60P videos for editing.
How to import and edit 50P/60P AVCHD files to Final Cut Pro? Pavtube MTS/M2TS Converter for Mac can help you. The software can help you convert 50P/60P AVCHD files to FCP best supported video format, FCP best format is Apple ProRes Codec MOV format, and you can edit recorded videos without rendering in this format. Below is a guide for you, you can follow it to transcode 50P/60P AVCHD videos to Mac for editing.
1. Download Pavtube MTS/M2TS Converter for Mac, install and launch it.
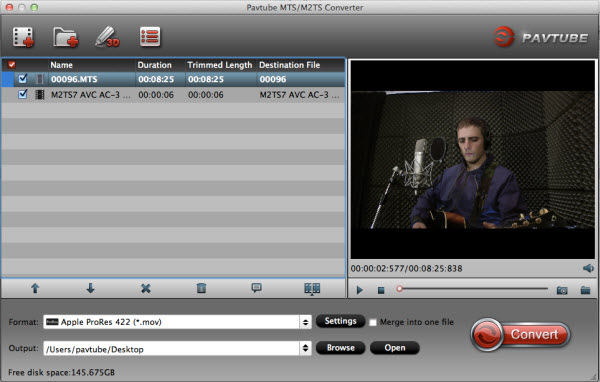
2. Import the 50P/60P AVCHD files to the converter. Click format bar to choose video format for output. As FCP X best supported video format is Apple ProRes 422 MOV format, you can choose Final Cut Pro -> Apple ProRes 422 (*.mov).

3. You can click “settings” button in the main interface to customize the output video’s parameters, such as resolution, frame rate, etc.

4. You can edit the AVCHD video before you convert them to FCP X, you can trim, crop the video, or add watermark and adjust effect to the videos which you will convert.
5. Click convert button to start converting 50P/60P AVCHD files to Apple ProRes 422 MOV format for FCP X.
Pavtube MTS/M2TS converter for mac can help you convert 50P/60P AVCHD files to FCP X Prores 422 format in few steps, after conversion, you can use the converted files in Final Cut Pro as you want, just have a try.
 Free Trial MTS/M2TS Converter for Mac

Useful Tips
- Best 5 TS Video Converter for macOS Sierra
- How to import AVCHD/MTS/MKV/AVI/MXF to Apple Aperture 3 on Mac
- Convert Humax recording 1080p videos to FCP and burn TS/MTS to DVD on Mac
- Panasonic Lumix DMC-GH3 Review: Transcode GH3 AVCHD to ProRes 422 for FCP (X)
- Burning AVCHD to DVD--how to convert and burn AVCHD(.mts) to playable DVD on Mac
- Convert Panasonic HC-X900, HC-X900M AVCHD 3D MTS on Mountain Lion


