 Home
HomeThe footage shot onto a P2 card in DVCPRO (HD) with Panasonic Camcorders such as AG-HVX200, AG-HPX300, etc are normally save as MXF files. These files, usually known as P2 MXF file for short, are not naturally supported by most media players and editors. When importing the P2 MXF files for playing back or editing, you probably will get an error message. Here I would like to share with you a video trans-coding tool to help you solve the problem—the Pavtube HD Video Converter, which can be used as a MXF converter as well. With this application you can convert P2 MXF to AVI and various other video formats easily. Audio track can be extracted for collection too.
You may download the trial version of the HD Converter and give it a shoot. There is not any time limitation, but please note that the trial converts video with a Pavtube logo watermark on the screen. Now please refer to the following guide how to convert MXF to AVI with Pavtube Video Converter.
Step 1. Import P2 MXF to the powerful MXF Converter.
Run the MXF to AVI Video Converter, click “Add” button and browse to the MXF files you’d like to convert, click “Choose” to confirm.
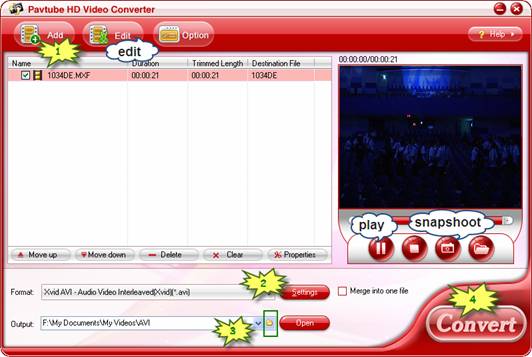
When the MXF files are loaded to the program, you can view the videos from the Preview window. Simply select an item and click the “Play” button. When the video is playing, you may take snapshoot when it plays to your favorable frame by clicking the “Snapshoot” button.
Step 2. Select output format- AVI, Divx AVI, Xvid AVI, HD AVI etc.
The Pavtube MTS/ MXF Converter is capable of converting unprotected MTS, MXF, M2T files to AVI, MP4, MOV, M4V, AVI and various other optimized formats for portable devices. Since we are converting MXF video to AVI, what you need is to click on the “Format” bar and select desired AVI format from the profile list.
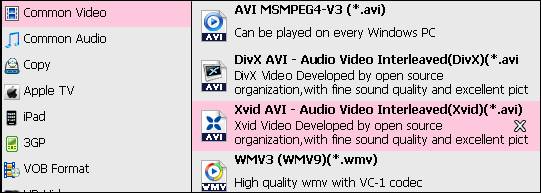
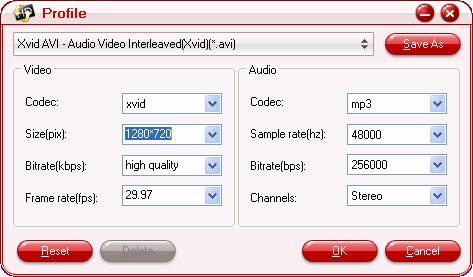
Pavtube HD Video Converter provides AVI formats with different codec. In order to save storage, you could follow “Common Video”-> “AVI MSMPEG4-V3” (*.avi), “DivX AVI (*.avi)” or “Xvid AVI (*.avi)”. If you are unwilling to degrade the HD MXF video quality, “HD Video”-> “AVI HD Video (*.avi)” is a better choice for you. You may also customize video and audio parameters in Settings panel. Simply click “Settings” button to and set the bitrate, frame rate, channels, sampling rate as desired values.
Step 3. Specify a folder to save the converted AVI files.
Click the small folder icon next to “Output” field and specify an output folder to save converted files. Click “Choose” to confirm.

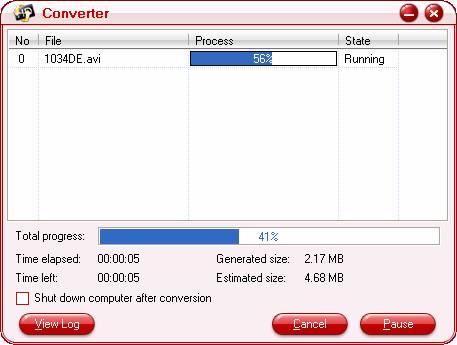
Step 4. Start converting MXF to AVI.
Click “Convert” to start converting MXF to AVI format when everything’s ready. The HD Video Converter supports batch conversion so you may load multiple MXF files and convert them to AVI at one time. You may also merge them to one file by checking the box “Merge into one file” before conversion starts. After conversion you may click “Open” button to find generated AVI files and use them freely.
 Free Trial HD Video Converter

Useful Tips
- How to convert 1080p to 720p?
- FAQ - Import Olympus E-PL1 AVI video to iMovie and FCE on Mac Mountain Lion
- Import/convert Olympus E-PL1 AVI to Final Cut Pro 7/X for editing on Mac
- How to Encode AVI Videos for iPad 3 on Mac?
- How to View AVI Videos on iPad 3?
- How to convert MVI to AVI file for edit in Pinnacle Studio?


