 Home
HomeWe use camera to record the wonderful moment in our lives. For example, you can make your friend help you record your rock show to remember the happy time or you can make a video recording of your kids' playing time. In the video recording, it is likely to miss a little bit of the beginning or the audio in your footage is noisy. So sometimes, we need to remove and replace the original audio from video with your own alternate audio files. What is the easiest way to do it?
Software Preparation
To mute the original audio in video and then swap the audio track on your video, you need a video software that can process the audio in video. Here, we stronly recommend Pavtube Video Converter Ultimate. With this program, you can replace audio in video, you can mute audio, detach the audio and you can add audio. You can eliminate background noise, organic noise, sound effects, you can address the sync problem in a video file and you can edit the audio in a video without any extensive training or expertise.
Key Features:
- Easy to use
- Supports to mute/add/replace/swap audio from(in) MP4, MKV, AVI, WMV, FLV, TS, PS, MXF, AVCHD, etc video.
- Supports to mute/add/replace/swap audio from(in) Blu-ray and DVD video.
- Add external subtitles to Blu-ray/DVD/Video files.
- Split video/audio to several parts.
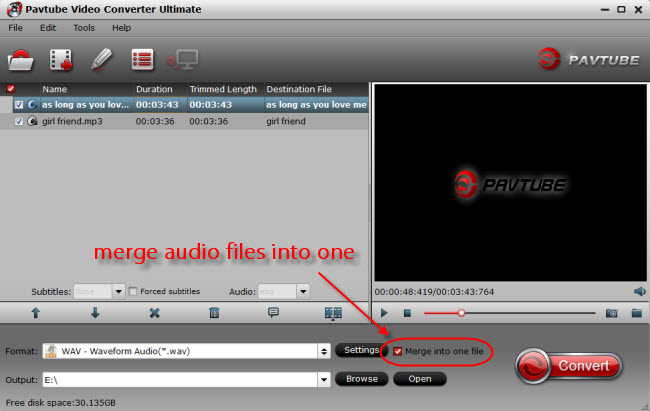
- Merge several video/audio clips to a single one.
- Trim video/audio footage
- Export only audio from a video
Note: Pavtube Video Converter Ultimate and its equivalent Pavtube iMedia Converter for Mac are available at 20% discount in that Pavtube Studio is holding on Year-End & Christmas Deal. You can buy them now from the links: Windows Buy | Mac Buy
Get Started to replace audio from video
Step 1: Import video file
Once you have downloaded and installed Pavtube Video Software, open the application and click on ‘File’. Search for the relevant video which you wish to edit and load it from the hard disk or the specific folder. You also can directly drag and drop the video files to the video software.
Step 2: Choose an output format.
You can keep the original video format. You also can change the original video format to another for more convenient playback. Click "Format" bar, from its drop-down options, select your desired ouput file format to save on your computer.

Step 3: Swap the audio track on your video
Check an item on the video displaying list to activate the video editing function, click the pencial like icon o the main interface to open the "Video Editor" window, go to the "Audio Edito" tab, check "Enable" and select "Audio Replace" option to browse an audio track on your local computer to add to the video to replace the original audio track. You also can add fade in/out effect on the audio files.
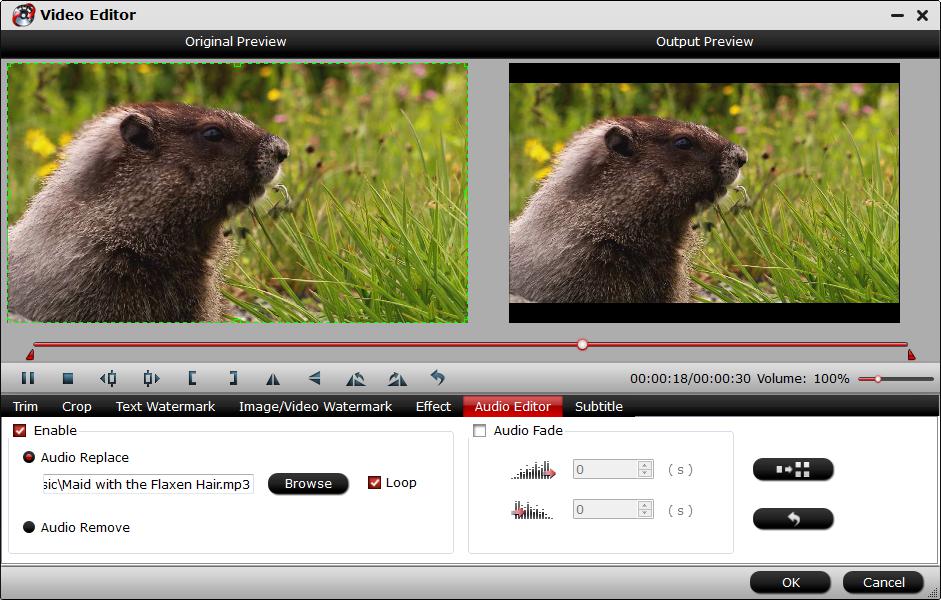
If your audio track is too long and you want remove the beginning part, you can firstly import your audio file to the software and trim it with this built-in editor to export the right audio files. Then you can load video to swap the audio track with the alternate one.
Step 4: Begin the audio replacing process.
Go back to the main interface to begin the conversion to replace audio in video with new sound track. When the conversion is completed, you will get a video with your sound track.
That's it. So easy, right? If you have the need, just try to replace/swap the audio from your MP4 video, MKV video, AVI video, FLV video even Blu-ray and DVD videos.
 Free Trial Video Converter Ultimate

Useful Tips
- Solve VLC MKV Integrated Subtitles Error
- Watch 3D Movies on ASUS Windows Mixed Reality Headset
- Top 10 VidCoder Alternatives
- 10 Places to Get 4K Ultra Movies and TV Show for 4K TV
- Get A Way to Play ISO Files on Samsung TV From USB or NAS
- Upload ISO Files to Google Drive for Accessing on Smartphone or Tablet


