 Home
Home2016 Summer Vacation is coming. Have you planed where to travel with your kids? Or you maybe going to do some other things significative with your children. No matter what plan you have, don't forget to record the meaningful time. For convenient storage, you also can burn your Summer Vacation video to DVD disc.
There are some applications on the market that allow people to put their own footage to blank DVD discs like Pavtube DVD Creator. It have you create playable DVD from pictures, music and various video types, including AVI, MKV, WMV, MOV, MTS, M2TS, TiVo, MOD, TOD, etc. You can burn your DJI Phantom 4 MOV/MP4 video, Canon XC-10 MXF footage, Sony Alpha 77 Mark II MTS, Sony HX90V XAVC, Sony DSC-RX10 III XAVC S, Panasonic AVCHD (Lite) MTS, Canon EOS 5DS R MOV and other camera/camcorder footage to DVD discs with DVD Creator.
Create Video DVD from Summer Vacation Video files
Step 1. Import Summer Holiday video to DVD Creator.
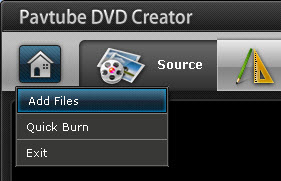
To import your Summer Vacation video files or pictures to DVD Creator, you can either drag and drop source files to source area or select “Import Files” from the drop-down list of Quick Start menu.
Tip: When loading .tivo files for burning DVD, you have to set “Media Access Key” first because TiVo files are protected. Find details in Option.
Step 2. Arrange DVD titles and chapters.
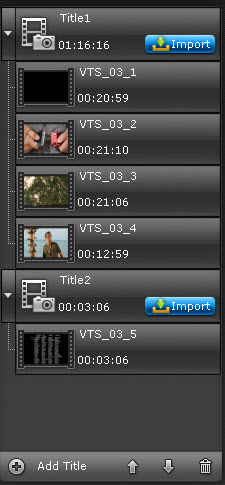
Each file is recognized as a chapter after being imported to DVD Creator. To add new title to DVD Creator, press the “Add Title” button at the bottom of source file area. Use Move Up and Move Down button to arrange chapters and titles in proper order to form your DVD main movie. Edit Video Clip(Trim, Crop, Watermark, etc) if necessary.
Step 3. Customize DVD Menu.
Press “Menu” tab to enter DVD Menu interface. There are menu templates for you to use. To use a preset menu template from DVD Creator, simply double-click on the template. When/if you don’t need DVD menu, use “No Menu” from Menu Templates area.
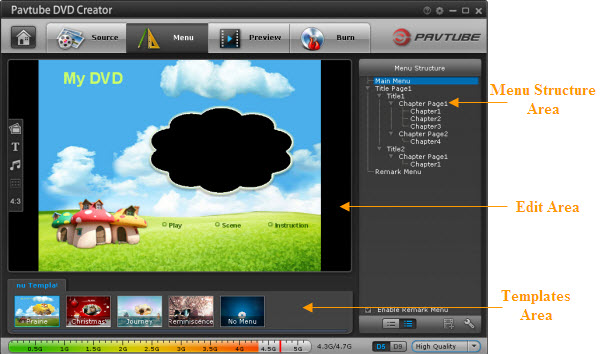
You may also customize DVD menu in your own way. This includes changing the DVD menu template/style, menu text, display aspect ratio and background for the DVD menu. You can also set chapter mark, and playback mode. Read details in Customize DVD Menu.
Step 4. Preview Created DVD-Video.
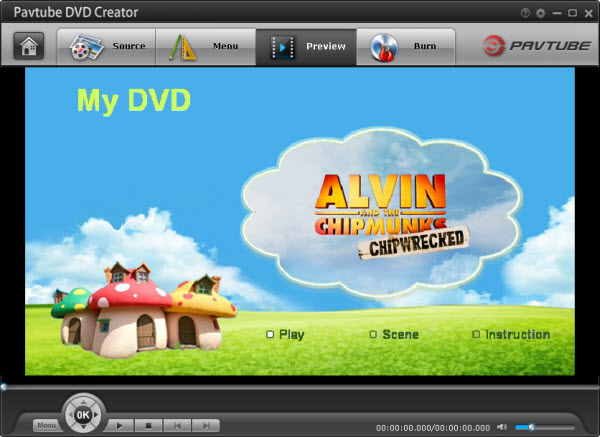
Once the menu has been decided you can preview how it will look in DVD Creator. Press “Preview” tab and your DVD video will be played just like on a DVD player. The control buttons here are corresponded with the keys on remote control.
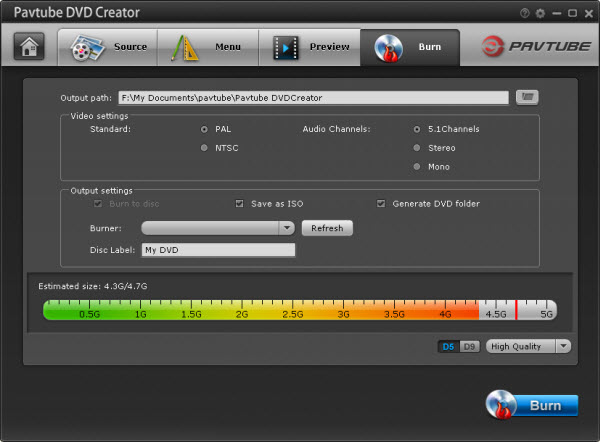
Step 5.Burn Summer Vacation Video DVD
Switch to “Burn” screen when you finished authoring DVD and feel like to burn created DVD-video onto a writable DVD (or ISO image) that will plays on standard DVD player after burning. DVD Creator writes content to single-layer 4.7GB and dual layer 8.5GB DVDs. At the bottom of main interface you can set DVD-5(D5) or DVD-9 (D9) as target disc type.
Besides Summer Vacation footage, you also can burn your daily life video to DVD discs. This way can let you collect your beautiful memory onto physical DVD discs and review them later day with your kids and grandchildren.
 Free Trial DVD Creator


