 Home
HomeChromebooks have never looked so attractive. Samsung's Chromebook Plus takes convergence to another level, with a clean, eye-catching design, gorgeous 2400 x 1600 display, great out of the box features such as the embedded stylus and the the ability to run both Android apps and ChromeOS. If you're a Chromebook Plus owner, you must have noticed that you can not currently play DVD on Chromebook Plus' Chrome OS by default. Unlike common movie file formats, playback of DVD video requires special decoding software and codecs to work. But Google has not licensed this software and included it with Chrome OS, and Chromebook Plus even doesn't have an internal DVD drive.
So, is there any ways to play DVD on Chromebook Plus offline? Yes, of course! To play DVD on Chromebook Plus offline, you need to rip DVD to Chromebook Plus compatible video formats first. There is a large amount of free DVD to Chromebook Plus converters, and we would like to recommend three free tools to give you an assistance to play DVD on Chromebook Plus offline.
Part 1: Rip DVD to Chromebook Plus with Pavtube Free DVDAid
Part 2: Rip DVD to Chromebook Plus with Pavtube Free Video DVD Converter Ultimate
Part 3: Rip DVD to Chromebook Plus with Handbrake
Part 1: Rip DVD to Chromebook Plus with Pavtube Free DVDAid
Pavtube Free DVDAid (Windows/ Mac) is a free DVD to Chromebook Plus converter that offers every user the chance to rip DVD to almost any Chromebook Plus supported video and audio formats with fast speed and excellent output quality. It will help you remove all the restrictions of DVD, like CSS, Region, RCE, Sony ARccOS and PuppetLock. Just download Pavtube Free DVDAid on your computer and here is a detailed guide of how to use this free tool to enable you to play DVD on Chromebook Plus offline.
Step 1: Import Source DVD Files
On its main interface, click "Load Disc" button to import source DVD files. You can also import DVD VIDEO_TS folder, ISO files, and IFO files into this freeware.
After this step is done, you are allowed to choose subtitles, audio tracke from source DVD and preview imported DVD files, take snapshots of any movie scenes for personal use in the right window.
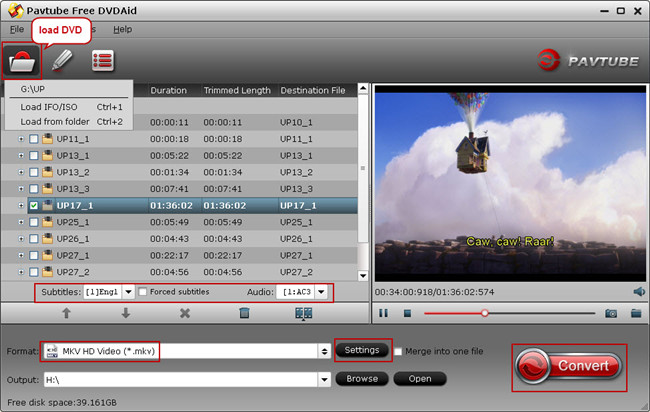
Step 2: Select Chromebook Plus supported Video Formats
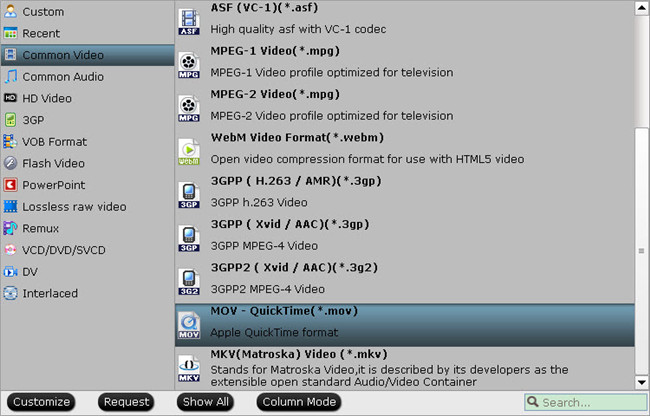
Now just click "Format" and you are free to choose any Chromebook Plus compatible formats like MKV, MOV etc. from "Common Video" and "HD Video". Then click "Browse" button to specify the output folder for ripped DVD movies.
Note: Pavtube Free DVDAid can't convert DVD to MP4, H.265/HEVC, 3D. If you want to convert DVD to MP4, H.265/HEVC, and more video formats, you need to upgrade it.

Step 3: Edit DVD movies for Chromebook Plus
Click "Settings" icon and you are allowed set video/audio codec, video display ratio, bitrate, frame rate and more to extend great DVD experience for Chromebook Plus. You can also click the "Edit" button on the main UI and edit your movies before conversion. Many video editing options are available: Trim, Crop, Text Watermark, Image/Video Watermark, Effect, Audio Editor, and Subtitle.

Step 4: Start DVD to Chromebook Plus Conversion
Hit "Convert" button to start ripping DVD to Chromebook Plus. Once the conversion is done, simply click the "Open output folder" button, find the created video file and stream to Chromebook Plus. Then you can freely watch DVD on Chromebook Plus offline.
Part 2: Rip DVD to Chromebook Plus with Pavtube Free Video DVD Converter Ultimate
Pavtube Free Video DVD Converter Ultimate is the best combination of DVD to Chromebook Plus converter and video to Chromebook Plus converter, which means that you can not only rip DVD sources like DVD disc, DVD folders, DVD IFO/ISO files to Chromebook Plus compatible video files, but also convert various videos and audios to Chromebook Plus. Similar to Pavtube Free DVDAid, this free tool allows you to create personalized videos with its built-in video editor and change video and audio settings to achieve better view experience on your Chromebook Plus. Now, follow the next guide to see how to rip DVD to Chromebook Plus without any payment.
Step 1: Load Source DVD Files
Insert the DVD disc to the DVD-ROM, launch this freeware, and click the "Load Disc" button upload source DVD. You can also import DVD VIDEO_TS folder, ISO image files, or IFO files for conversion.
If you have some video files need to play on Chromebook Plus, just click "File" >"Add Vide/Audio" or "Add from folder" button to load video files.
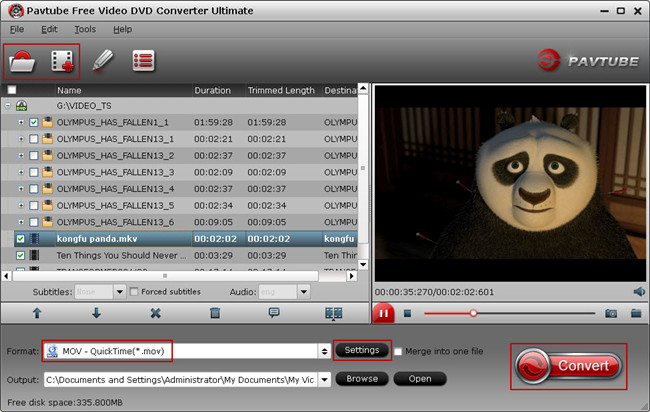
Step 2: Select Chromebook Plus supported Video Formats
Click on the Format bar and you will see many video and audio format like MOV, MKV, WMV, AVI, FLV, MP3, M4A, WMA, WAV, etc listed here. Just click "Format" bar to choose any Chromebook Plus compatible formats like MKV, MOV etc. from "Common Video" and "HD Video". Then click "Browse" button to specify the output folder for ripped DVD movies.
Note: Pavtube Free Video DVD Converter Ultimate can't output MP4, H.265/HEVC, 3D, etc. If you want to convert DVD to MP4, H.265/HEVC, and more video formats, you need to upgrade it.
Step 3: Create Personalized DVD Movies for Chromebook Plus
To achieve best video and audio playback on Chromebook Plus, you could click the "Settings" button to customize output video quality like resolution, frame rate, bit rate, audio channel, etc. Or click the "Edit" button on the main UI and edit your movies before conversion. Many video editing options are available: Trim, Crop, Text Watermark, Image/Video Watermark, Effect, Audio Editor, and Subtitle.

Step 4: Start Ripping DVD to Chromebook Plus Process
Click the red big "Convert" button to start ripping DVD to Chromebook Plus process. Once the process is completed, simply click the "Open output folder" button, find the created video file and stream to Chromebook Plus. Then you can watch DVD on Chromebook Plus offline without any trouble.
Part 3: Rip DVD to Chromebook Plus with Handbrake
Handbrake is an open source that is completely free to allow users transcode video files from one format to another. It is also one of the best DVD to Chromebook Plus converter you can take a try. Please notice that Handbrake has no support for ripping copy protected DVDs. Its output video formats are limited to MKV and MP4, its DVD editing function are very limited. Here are steps of how to use this free tool to rip DVD to Chromebook Plus for offline playback.
Step 1: Import DVD to Handbrake
Launch Handbrake on your computer, import the DVD file by clicking the large "Source" button. Then click "browse" for the location where your ripped DVD be saves to. Click "Save".
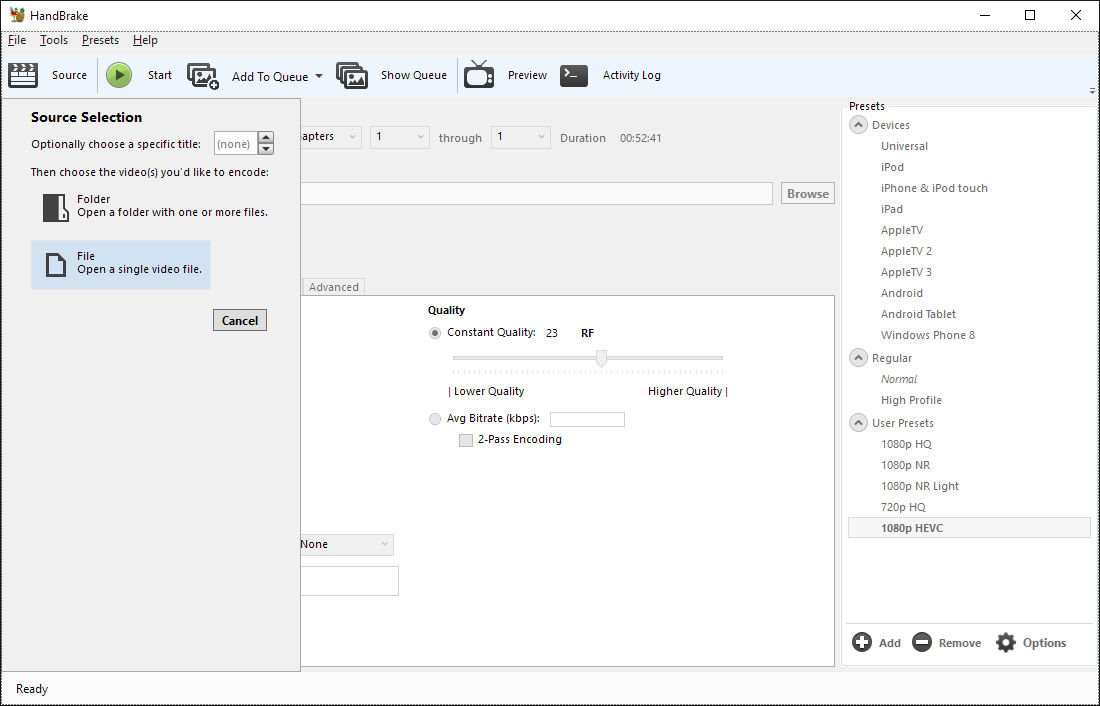
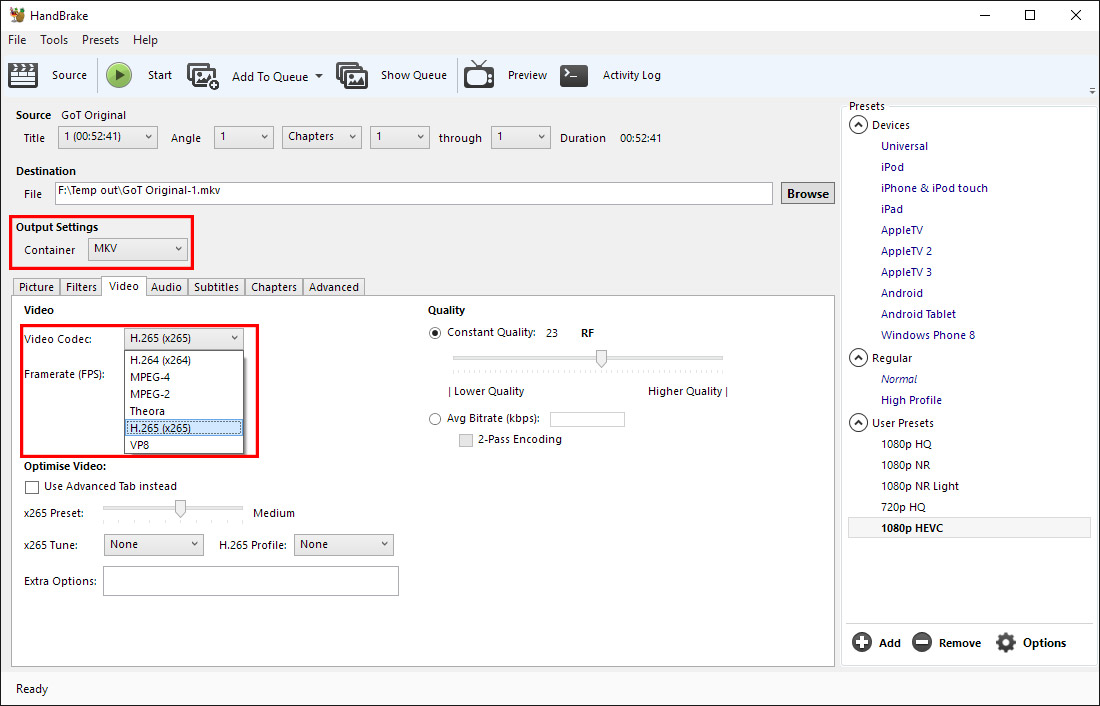
Step 2: Choose output file format for Chromebook Plus
Go to the Output Settings and choose MP4 or MKV as the output format.
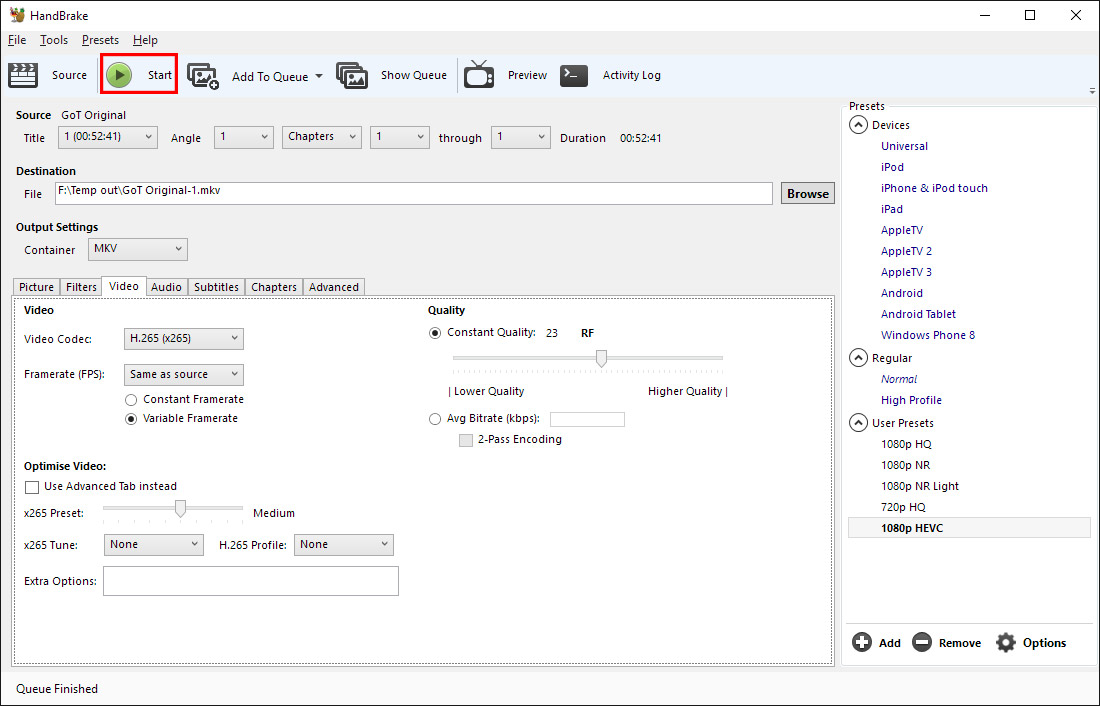
Step 3: Start DVD encoding process with Handbrake
Click "Start" and let the encode happen, which may take a considerable amount of time depending on your hardware. After the encode is done, text saying"finished" will appear in the bottom left corner. Then you will get a video file in MP4 or MKV format to play on Chromebook Plus.
Conclusion:
All free tools listed above can help you watch DVD on Chromebook Plus offline, but every program comes with some disadvantages. For example, Handbrake has no support for ripping copy protected DVD. Its output video formats are limited to MKV and MP4. Its DVD editing function are very limited. Pavtube Free DVDAid and Free Video DVD Converter Ultimate has no support for ripping DVD to MP4, but you can go to their upgrade version to get MP4 video files and find more function. It doesn't cost too much. Just select a DVD to Chromebook Plus converter according to your own needs.
Related articles:
Handbrake VS Pavtube Free Video DVD Converter Ultimate
Pavtube Free DVDAid VS Handbrake - Best Free DVD Ripper
Top 6 Free Pavtube DVD Copy Softwares
 Free Trial Video DVD Converter Ultimate

Useful Tips
- 3 Free Tools to Play DVD on Chromebook Plus offline
- Free Convert YouTube to MP3 on Windows
- Free Convert TS File to MP3
- How to put AVI, MKV, MP4 video and DVD movie to Nokia C7, N8, E7?
- Get Nexus S play your AVI, MKV, MP4, MTS videos and DVD movies
- Put DVD, MKV, AVI, MP4, WMV, MTS to Motorola Atrix 4G for playback


