 Home
Home
The iPhone 4 is really a big shock. In any case, the upcoming amazing iPhone 4 will change our lives. By unveiling iPhone 4, Apple is leaping ahead of the competition once again this summer. Video calling, multistasking, HD video recording and editing, multi-touch operation, all of these new features are enclosed in a mere 9.3mm thin smart phone. Wait, there is something more to mention--- the retina display. The new 960-by-640 backlit LCD display boasts a pixel density of 326 pixels per inch, making it the highest-resolution phone screen ever. With the iPhone 4 at hand, HD videos and movies will looks sharper and incredibly vivid. And the iPhone 4 features a flash drive of 16GB or 32 GB capacity, enabling users to save more media contents. All of that makes enjoying HD videos on iPhone 4 possible. So why not take advantage of the breakthrough technology and watch HD movies on iPhone 4?
In the following passage I’d like to share with you an effective way for watching blu-ray and DVD commercial movies on iPhone 4G by converting the movies to iPhone compatible video formats with Pavtube iMedia Converter for Mac. This app is an ultimate solution for converting videos, footages, flashes, TV recordings, and ripping commercial blu-ray discs and DVDs to various portable players (iPad, iPhone, iPod, Apple TV,etc). You can get a free version of iMedia Converter for Mac (intel only, Mac OS 10.5 and above) and try it out, only there is Pavtube logo on the screen.
Now let’s see how to convert blu-ray discs and DVDs to iPhone 4G.
Step 1. Run iMedia Converter and load source disc.
Note that if you are about to rip blu-ray disc on Mac, an external BD drive is required for loading blu-ray movie. The iMedia Converter is able to decrypt commercial blu-ray discs and protected DVDs, all you need is to put blu-ray disc/ DVD to BD drive, and click on “BD/DVD folder” to load the movie.
Step 2. Select desired episodes of the movie and set subtitle/ audio track.
When the movie is loaded to iMedia Converter, the window should be like it below shows:
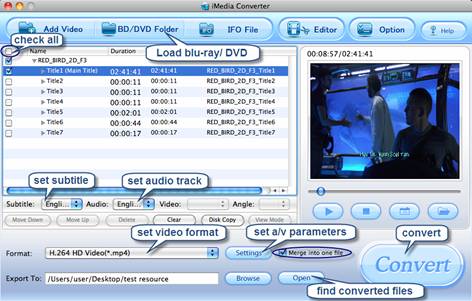
From here you decide which chapters to convert, and tick them. Basically the main movie is included in the “Title 1”, others are commentary, titles, ads, etc. Then you choose proper subtitles and audio track for each selected Title. In preview window you can observe the effect.
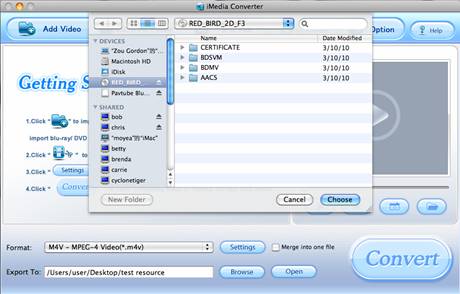
Step 3. Set output format and location.
Now you can specify an output folder. Click “Browse” button and navigate to where you’d like the converted files be saved to. As to the output format, there are many to choose from. Since the iPhone 4 supports play back of up to 720p high definition video, you may click on the “Format” bar and follow HD Video-> H.264 HD Video (*.mp4) or H.264 HD Video (*.mov).

Then you can do some further settings and customize the blu-ray/ DVD movie better fit the iPhone 4. Simply click on “Settings” button to enter the configuration panel to optimize the format.
A recommended config is listed below for your reference:
Video
Codec: h.264
Bitrate: 2500/4000/6000 kbps
Size: 1280*720p
Frame rate: 30fps
Audio
Codec: aac
Bitrate: 120/160kbps
Sampling rate: 44.1/ 48khz
Channels: 2
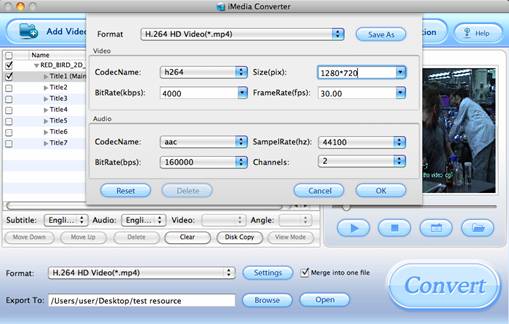
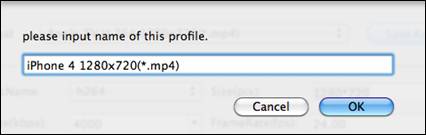
After set the video and audio parameters, do not forget to click “OK” button. If you would like to preserve these settings for future use, simply click “Save As” button and give it a name, eg. iPhone 4 1280*720 (*.mp4). The next time you run iMedia Converter to convert blu-ray and DVD movie to iPhone 4, you can easily find the customized new format in “Custom” row.
Step 4. Convert blu-ray/ DVD movie to iPhone 4.
Finally we come to the last step. When back to the main interface, you just click the “Convert” button to start converting blu-ray/ DVD movie to iPhone 4 compatible format. Generally the blu-ray ripping process cost hours. In order to save time, you can click on the “Option” menu, and tick “auto shut down computer after conversion” box so that the app will shut down your Mac or MacBook upon the completion of ripping.
After conversion, you can click “Open” button to find the converted files. If you’d like to convert all the selected Titles into one file, do not forget to check “Merge into one file” before converting movie. OK, everything’s done. Now you may open iTunes and sync the files to your brand new iPhone 4. Enjoy the movies!
Try Pavtube iMedia Converter for Mac
Try Pavtuve Blu-ray Video Converter Ultimate for Windows
If you wanna share your videos or have perfect movie-watching experiences at home, you can make use of Apple AirPlay to watch movies on your wide screen TV via Apple TV 2.
 Free Trial iMedia Converter for Mac

Useful Tips
- How to Sync Music, Photo, Video files from Mac to iPhone 5s?
- Watch Blu-ray ISO movies on Apple's new iPhone 5C
- Easy Way to Convert DVD ISO/IFO to iPhone 5S/5C on Mac
- The process of making iPhone 5S/5C play Blu-ray movies
- Download free iPad, iPod, iPhone wallpapers
- Convert MKV/ M2TS/ AVI/ WMV to iTunes for iPad, iPhone and iPod Touch 5


