 Home
HomeSolution 1: Copy BD/DVD disc to Mac Hard Drive in .m2ts, .vob, or other formats
Solution 2: Make 1:1 Copy of Blu-ray or DVD disc with all audio and subs tracks preserved
Solution 3: Burn Blu-ray movie from disc to disc
Solution 4: Burn a Blu-ray from a file on Mac Hard Drive
Solution 1: Copy/rip Blu-ray/DVD disc to Mac Hard Drive in .m2ts, .vob, or other formats
Pavtube Blu-ray Ripper for Mac
Part 1: Copy/rip Blu-ray/DVD disc to Mac Hard Drive in .m2ts/.vob format
1. Run Pavtube Blu-ray Ripper for Mac, and click “BD/DVD Disc” icon to load Blu-ray or DVD disc from an external BD drive or Mac’s built-in DVD drive. Note that a Blu-ray disc can only be loaded into the program via an external BD drive.
2. Click on the dropdown menu of format and select “Copy” > “Directly Copy”.
3. Click “Browse” button to specify a storage path for the output .m2ts/.vob files. 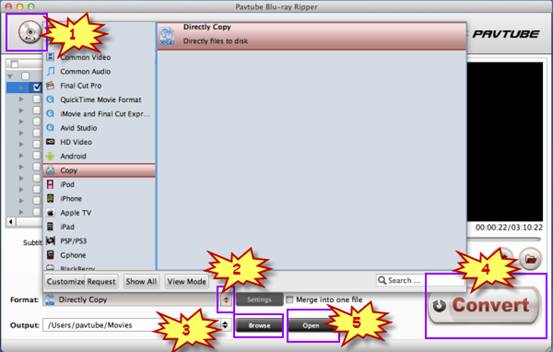
4. Click “Convert” to start copying Blu-ray/DVD to Mac Hard Drive while maintaining the original .m2ts or .vob format.
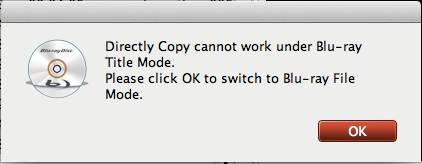
Note that if you are copying a Blu-ray disc, as soon as you clicked “Convert” button, a prompt window as below will pop up, just click “OK” button to continue, and then click “Convert” button again to start Blu-ray copying.
5. When the copy work is finished, just simply click “Open” button to get the .m2ts/.vob files.
Part 2: Rip/convert Blu-ray/DVD to other formats
Pavtube Blu-ray Ripper for Mac is capable of converting BD/DVD movie to a wide variety of HD and SD file formats, including DivX AVI, Xvid AVI, WMV, H.264 video, MP4, MKV, TS, MOV, ASF, MPEG-2, MPG, 3GP, and more.
After loaded Blu-ray or DVD movie files into Pavtube Mac Blu-ray Ripper, you need click on the dropdown menu of format to select your wanted file type as output format.

After that click “Browse” button to specify a destination folder, and click “Convert” button to start ripping Blu-ray/DVD to your wanted file format. When conversion is done, click “Open” button to get the converted files with ease.
Solution 2: Lossless Blu-ray/DVD to MKV backup on Mac: keep all audio/subtitles tracks and chapters
Required software:
Pavtube ByteCopy for Mac
About Pavtube ByteCopy for Mac
Pavtube ByteCopy for Mac is specially developed for Mac users to create MKV container file from recently released Blu-ray and DVD movies with lossless quality. By using this Mac tool, users are able to package all audio tracks/subs streams/chapter information in a Blu-ray/DVD disc into a single MKV file, meanwhile keep videos in original Blu-ray and DVD quality without any loss.
Step 1: Free download Pavtube ByteCopy for Mac, install and run it on your Mac computer.
Here we take backing up a Blu-ray disc for instance.
(Note: An external BD drive is required for processing Blu-ray disc).
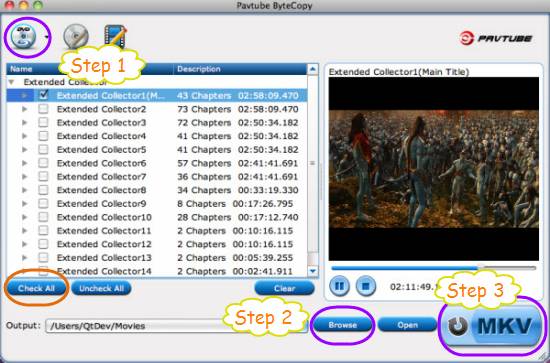
Connect the external BD drive to your Mac, and then insert the Blu-ray disc to the drive. Launch Pavtube ByteCopy for Mac, and click “DVD/BD Disc” icon in the top left corner of the main interface to load your Blu-ray movie from your external BD drive. After the loading process is done, you will see all titles in the BD movie are showing with main title checked by default. If you wanna backup main title and all bonus features to MKV, you need press “Check All” button at the bottom left corner of the main interface to select all titles. If not, the software will backup the main title only.
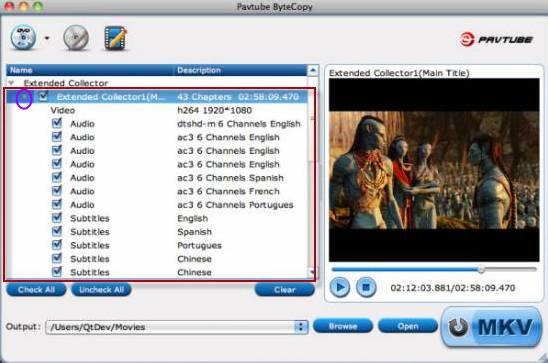
BTW, you can click the “triangle” icon before a title to see the detailed information of the source file, including video info, audio tracks, and subtitles streams. If you want to remove unwanted audio tracks and subs tracks, you can remove the check mark before them respectively to keep the ones you need at will. If you prefer to keep all audio/subtitles tracks and chapters, you needn’t adjust anything at all.
Step 2: Click “Browse” button to specify where to locate the output MKV files.
Step 3: Click “MKV” button to start lossless Blu-ray to MKV backup on Mac.
When the bluray backup on mac is finished by Pavtube ByteCopy for Mac, you can click “Open” button to get the final output MKV files with all audio/subtitles tracks and chapters preserved.
Note: The lossless DVD to MKV backup process goes the same as the above mentioned Blu-ray backing up steps.
Solution 3: Burn Blu-ray movie from disc to disc on Mac
Pavtube Blu-ray Ripper for Mac
Part 1: Create BDMV folder for Toast using Pavtube Blu-ray Ripper for Mac

Step 1: Run Pavtube Blu-ray Ripper for Mac, and load the source Blu-ray from the external BD drive.
Step 2: Click “Browse” button to specify a destination folder for the output files.
Step 3: Click “Full Disc Copy” button to copy Blu-ray movie to your Mac Hard Drive with original structure preserved.
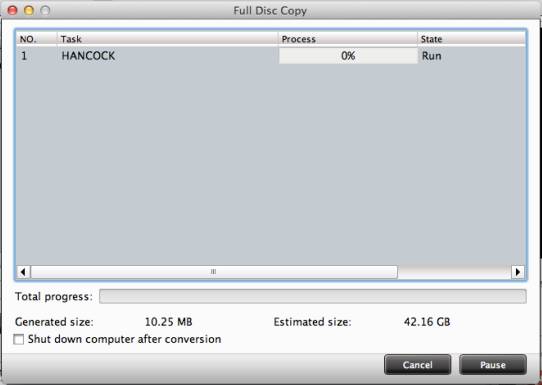
Step 4: When the copying task is finished, click “Open” button to get the generated files. The final output files have the same structure with the original Blu-ray disc.

Part 2: Burn a BDMV folder to a blank Blu-ray disc by using Toast 10
Requirements:
- A BDMV folder (We’ve already created one using Pavtube Blu-ray Ripper for Mac)
- A Toast supported drive capable of burning Blu-ray discs
- Toast Titanium Pro 9 or later.
- Recordable Blu-ray (BD-R) disc
Open Toast. On the main interface, click the “Video” button in the upper-left portion of the screen, and select “BDMV Folder” from the menu that appears beneath it. The window should look something like the below, though it may vary slightly between Toast versions.
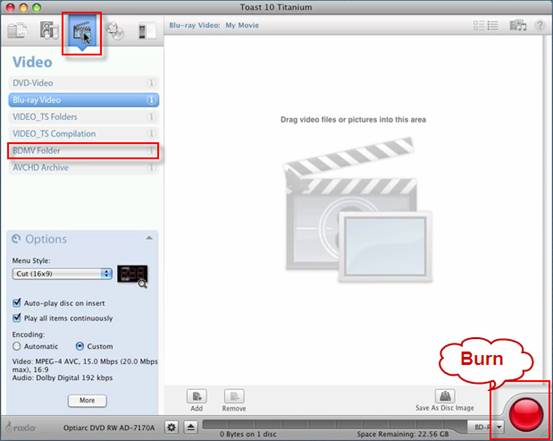
Then simply add your BDMV folder to Toast, and put a recordable Blu-ray disc into your burner and click the big red button to burn your disc.
Warning: I’ve read elsewhere that such discs burnt in this way don't work in some players, such as a Sony BDP-S330 (while SONY BDP-S350 plays them fine). If so, we suggest you to rip Blu-ray to HD Video previously and use “Blu-ray Video” setting under “Video” section to do Blu-ray Burning. Just see solution 4.
Solution 4: Burn a Blu-ray from a file on Mac Hard Drive
If you already have some HD files ripped from a Blu-ray disc stored on your Mac Hard Drive (See how to use Pavtube Blu-ray Ripper for Mac to Rip/convert Blu-ray/DVD to other formats in part 2 of solution 1), you may perform the following guide to burn a new Blu-ray disc by using Toast.
See details at Burn your HD Movies to Blu-ray Disc using Toast
 Free Trial BDMagic for Mac

Useful Tips
- Burn TiVo shows to a DVD using Windows DVD Maker
- How to convert HD footages for authoring with iDVD?
- AVCHD MTS to iDVD - Creating a DVD from your MTS/M2TS videos with iDVD
- How to convert TiVo recordings for burning DVD with Nero?
- How to convert F4V files for burning DVD with Nero?
- How to convert HD footages for burning with Windows DVD Maker?


